Restore Old Family Photos with Photoshop and Image Colorizer (Step by Step )
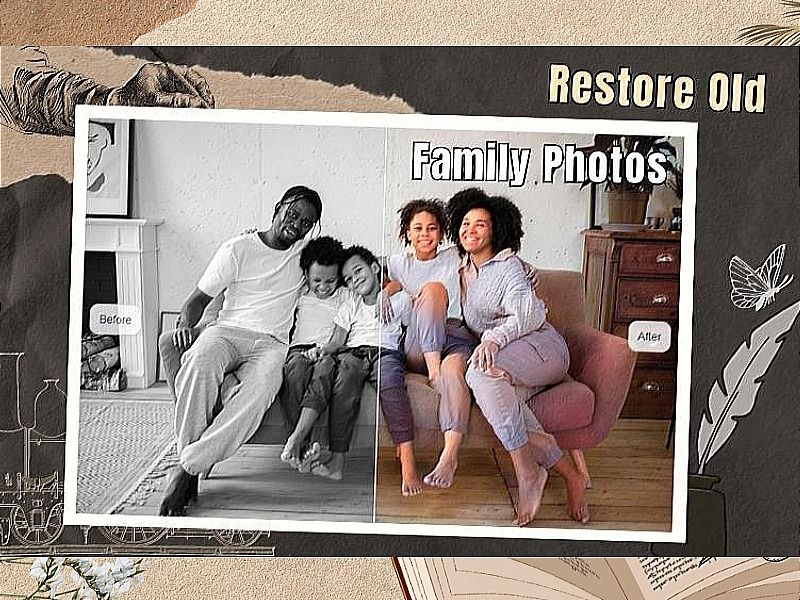
Family photos are an essential part of our memories and heritage. They give us a glimpse into the past and help us connect with our family history. However, these photos can fade, become damaged, or lose their color over time. Restoring old family photos is a great way to preserve these memories for future generations.
Restoring old photos was more complex work in the past. You may need to find and hire a photo editing expert to help you escape the trouble. Modern technology gives us more choices when fixing damaged and old photos. In this article, we will take you a closer look at Photoshop and Image Colorizer. You will learn a handy guide on restoring old family photographs with the two tools. Follow us to unlock the tips now!
Scan the Old Family Photo

Both Photoshop and ImageColorizer require digitalized versions of photos before you can use them to restore your family's collections or albums. So the first step is to scan and digitalize your old photographs. Using a high-resolution scanner to capture all the photo details is best. There are different ways to get a high-quality scanned photo, such as a digital camera, a smartphone app, or a flatbed scanner. And I recommend you download a photo scanner app on your phone, which is more accessible than a camera or a scanner machine.
Here are some photo scanner apps that you can try:
- Google PhotoScan: This free app allows you to scan and digitize your old physical photos. This app uses your smartphone camera to capture the picture, automatically enhancing and correcting any imperfections.
- Microsoft Lens: Microsoft Lens uses your smartphone camera to capture the image. The best part of this app is its enhancement features. It allows you to crop, rotate, and adjust the image to ensure it is clear and readable.
- Adobe Scan: You can use Adobe Scan to scan photos and save them as JPEG files. This scanner app can remove glare and shadows with advanced Adobe Sensei technology.
You can also read this guide (published by Expertphotography) to find a better scanner app that fits your devices and needs.
Restore Old Photos with Photoshop
Step 1: Opening the Photo in Photoshop
Once you have scanned the old photos and saved them as jpeg or png files, you can import the image into Photoshop software. Before editing and enhancing the image with powerful Photoshop features, keep the original layer locked and create a second copy layer. All editing will be done on the duplicate layer to prevent the original image from being corrupted.

To create a duplicated layer, follow these steps:
- Select the original layers in the Layers panel.
- Right-click the original layer > Click "Duplicate Layer"
- Rename the copied layer and click "Ok" to apply changes.
Step 2: Crop and Rotate the Photo
Before making any other adjustments, ensure the image has a proper size, good perspective, right orientation, and clean layout. Cropping can resize the image or remove any unwanted edges or borders. Also, you can get a correctly oriented image by using rotating tools.

To crop an image, follow these steps:
- Click the "Crop" icon to keep the cropping toolbar selected.
- Draw a new cropping area or drag the corner and edge handles to specify the crop boundaries in your photo.
- Adjust the crop area as needed by dragging the edges or corners of the box.
- Press Enter on your keyboard to apply the crop.
To rotate images in Photoshop,
- Go to Image > Image Rotation > Choose from the angle options
- Rotate the image to a specific angle, such as 90 degrees Clockwise or Counter Clockwise.
- Click "OK" to apply the rotation.
Step 3: Remove Noise and Grain in Old Photos
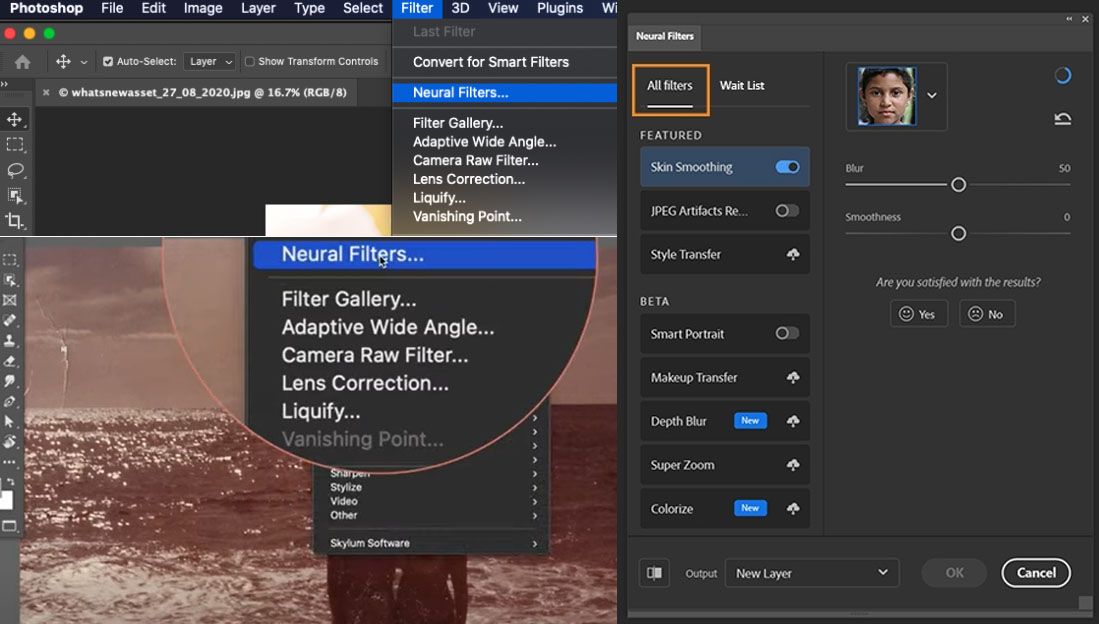
Now the image is ready to be fixed and enhanced. We will first use Photoshop's Neural Filters feature to remove unwanted noise and grain from the old photos. Follow these steps to get started with Neural Filters.
- Go to the "Filter" menu > select "Neural Filters."> Select the "Denoise" filter. This filter can help remove the noise and grain often appearing in old photos.
- Adjust the "Strength" slider to control the level of denoising. You can see a live preview of the effect as you adjust the slider. You can also adjust "Sharpen Details" to make the photo details easy to view.
- Click "Apply" to apply the filter to your image if you are satisfied with the denoising.
Neural Filters is a recently added feature in Photoshop. To access it, make sure you are using the latest Photoshop version. If you need to become more familiar with it, read this official guide to explore using Neural Filters. And you can also watch this video to learn how to get Neural Filters in your Photoshop.
Step 4: Removing Scratches, Dust, and Blemishes
Removing scratches, dust, and blemishes from old photos can help restore them to their original condition and preserve them for future generations. Here's how to achieve the goal.
- Under the Neural Filters menu, select the "Restore" filter from the list on the left-hand side. This filter can help repair old photos' cracks, scratches, and other damage.
- Adjust the settings for the filter using the sliders and options in the panel. You can see a live preview of the effect as you adjust the settings.
- Once you're happy with the restoration, click "Apply" to apply the filter to your image.

Step 5: Colorize Old Photos Using Colorize Filter
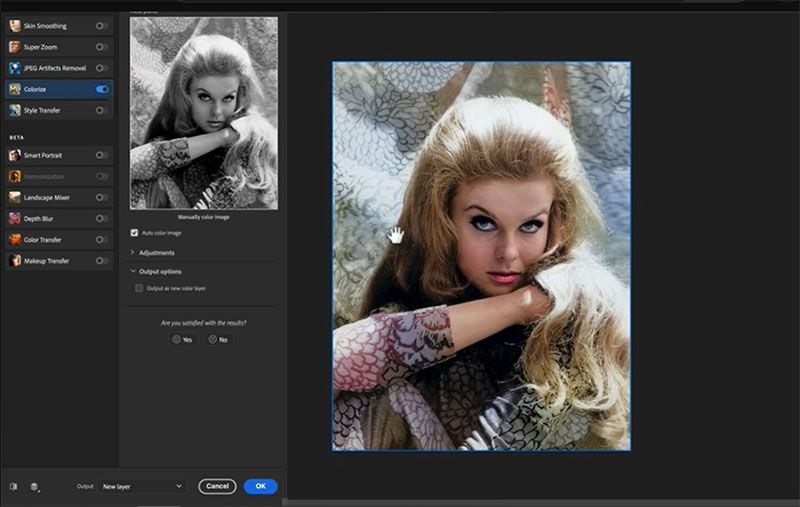
Still, choose the "Colorize" filter under the Neural Filters menu. This filter can help you add color to a black-and-white photo quickly and naturally.
- Go to Neural Filters > Select Colorize Filter > Open the Colorize filter's window.
- Adjust some parameters to your needs by dragging the sliders. Adjustable parameters include Saturation, Cyan / Red, Magenta Green, Yellow / Blue, Color Artifact Reduction, etc.
- Once you're happy with the colorization, click "Apply" to apply the filter to your image.
Once you have finished the photo restoration process, save the photo in the digital format you need.


Colorize Old Family Photos with Image Colorizer
Image Colorizer is an online photo restoration app that can restore old and damaged photos with advanced AI technology. It can automatically add color to black & white pictures, enhance photo quality by upscaling face and details, fix blurry parts to make the image easy to view, and retouch the portrait to make a face look better. Moreover, it can remove scratches from pictures in one click!

Step 1: Upload Your Photo to the Image Colorizer
Go to the Image Colorizer website and choose the "Colorize" section from the home page. Then, upload an old photo to this platform. Ensure the uploaded image size is up to 800px if you are a free member.

Step 2: Edit and Colorize Old Photos
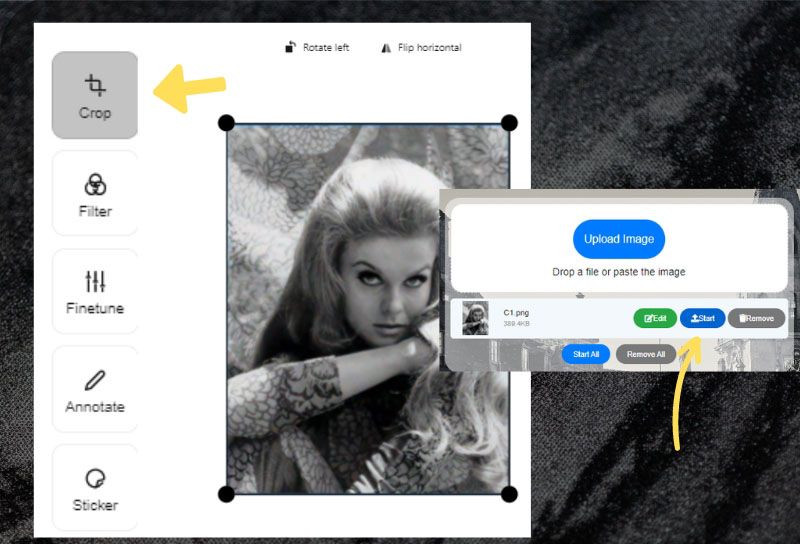
Once you upload the image, Image Colorizer will offer you two options: Edit and Start.
If you want to edit the image to make it better before restoration, click the "Edit" button and go to adjust the image by cropping the image size, adding text, or adding a proper frame.
If you don't need to adjust the image, click the "Start" button to let the tool colorize your old photos. Within a few seconds, Image Colorize will return the result.
Step 3: Preview and Save the Colorized Picture
Image Colorizer allows you to preview the colorized photo online. Click the "Preview" button to see if the result is what you are looking for. Once satisfied with the effect, you can download the image to your computer.

Step 4: Sharpen Details and Enhance Image Quality
If you think the quality of the colorized image can't meet your needs, you can further enhance the image using our "Restore Photos" tool. This tool helps you upscale and sharpen blurry details to make the image crisp.
To sharpen the details, do follow things:
- Click the "Restore Photos" toolbar from the home page.
- Upload the colorized photo to Image Colorizer.
- Wait for a few seconds to get the sharpened image.
- Preview and download the enhanced image.
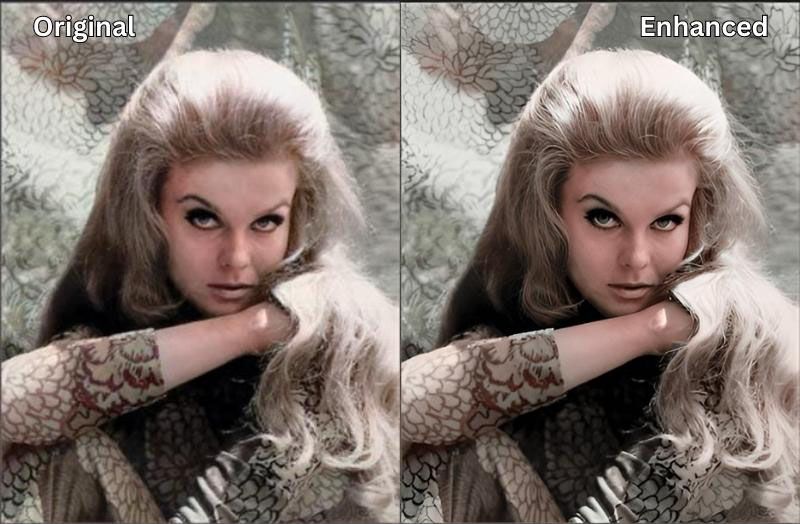
Other good features to help you restore old photos
Image Colorizer offers six different tools for you to restore old photos. Whether you want to colorize black & white photos, retouch human portraits, or fix blurry things in the pic, you can get the right solution. In addition to Colorize and Restore features, you can try the following ones to see how Image Colorizer works.
AI Enhance: This tool enhances the overall quality of the image. It makes the background clear and improves the person's appearance. Plus, it optimizes the image by adjusting the brightness and contrast automatically.
AI Retouch: This feature works best with portrait and faces photos. It can detect the imperfections of the old image, remove unwanted things in the skin, and repair the original skin texture. The retouched face will look natural, without halos or artifacts.
AI Repair: This tool can remove scratches and creases from the image. It can restore the photo with one click without damaging the image's original quality.
Cleanup Photos: Sometime, there may be some unwanted objects in the photo, such as a tree, a box, a road sign, a drink bottle, etc. These objects may make your photo lose focus and visual impact. With Cleanup Photos, you can easily remove unwanted objects and keep the image clean and focused.
If you want to learn more about Image Colorizer, please read our guide here: ImageColorizer Tutorial: Restoring Old Photos.
Conclusion:
Restoring and colorizing old family photos is a great way to preserve these memories for future generations. Using tools like Photoshop and Image Colorizer, you can breathe new life into old pictures and ensure they are enjoyed for many years.
The process can be rewarding and fulfilling, whether restoring a treasured family heirloom or a collection of old family photos. Following the tips outlined in this article, you can ensure that your restoration and colorization efforts are successful and produce the best possible results.
If you are interested in using AI tools to restore old photos and enhance their quality, our updated list of" Best 7 AI Colorizer Apps to Restore Your Old Photos in 2023 "will guide you to unlock more tips and tracks of old photo restoration.
